|
|
Kongsi Gambar2 Artwork Korang.Guna Photoshop etc
[Copy link]
|
|
|
Nih ada satu lagi...
 
Model : Juma
[ Last edited by aa2006 at 17-4-2007 11:14 PM ] |
Rate
-
1
View Rating Log
-
|
|
|
|
|
|
|
|
|
|
|
Lagi... lagi...
Like Painted (Before) Like Painted (After)
  |
Rate
-
1
View Rating Log
-
|
|
|
|
|
|
|
|
|
|
|
Tengoklah lagi...
 
Clean Sketch (Before) Clean Sketch (After)
[ Last edited by aa2006 at 11-4-2007 03:26 PM ] |
Rate
-
1
View Rating Log
-
|
|
|
|
|
|
|
|
|
|
|
Originally posted by artgeex at 11-4-2007 04:18 PM
wow! cool tu! artwork kau yang lain-lain pun boleh tahan, cuma cuba kekalkan konsep camni, sebab vectoring biasa is a bit boring, ala katun ni nampak cam retro sikit 
Artgeex...
Aku kalo bab vector style yang guna illustrator memang out...
nih 100% aku guna photoshop... |
|
|
|
|
|
|
|
|
|
|
|
Reply #154 aa2006's post
Pasal image budak peminat Arsenal tu... cuba ko citer kat sini camna ko buat coloring untuk image bawah sekali tu. Mesti ramai sini yang berminat nak tau cara ko buat tu.
Kalau nak buat tu, cara aku is lepas dah buat lineart (image tengah), aku buat layer baru... then paint guna flat color... katakan muka dia... lepas dah paint, aku select MULTIPLY kat Layer Blending mode then lock transparency layer tu. Sebab aku guna MULTIPLY is kalau brush aku overlap edges itam tu, dia takkan kacau edges tu. Lepas tu baru aku paint shading atau highlights. Dah habis muka dia, aku buat new layer (katakan untuk baju dia) and repeat process atas. Trick dia is untuk setiap section, aku guna layer baru.
Sesiapa berminat, silalah cuba technique ni.  |
|
|
|
|
|
|
|
|
|
|
|
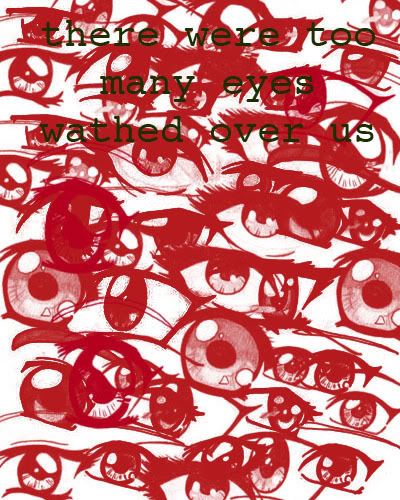
3 Tone Color


POP ART
(for simple pop art)
Step 1
1. Open project file > Duplicate layer (Rename : IMAGE)
2. Create A New Layer > Color Canvas : White (Rename : WHITE)
3. Working on the Image Layer : (Before that : Jadikan layer ini sbg layer paling atas)
- Delete background at the image layer.
- you can use : Pen tool, eraser or extract.
Step 2
1. Desaturate the Image layer (Ctrl + Shift + U)
2. Crop Image (if you want) > Click Rectangular Marquee Tool > Select Image you want Crop > Click Image > Crop
3. Click Image > Adjustments > Brightness/Contras
Setting the sliders : Brightness : -32 / Contras : +35
Click ok
Step 3
1. Filter > Artistic > Cutout
Setting the sliders :
- No. of Levels : 4
- Edge Simplicity : 2
- Edge Fidelity : 2
Click ok
2. Click Image > Adjustments > Levels
Adjust the sliders until your image is : (Adjust input only)
- Black
- White
- Grey
Click ok
3. Apply the Cutout Filter again
- No. of Levels : 4
- Edge Simplicity : 4
- Edge Fidelity : 2
Click ok
4. Adjust the Level again if you want Image look of 3 tone (Black, White, Grey)
Step 4
Don't forget coloring your image.
Just using the Paint Bucket Tool > and Pick A Color. |
Rate
-
2
View Rating Log
-
|
|
|
|
|
|
|
|
|
|
|
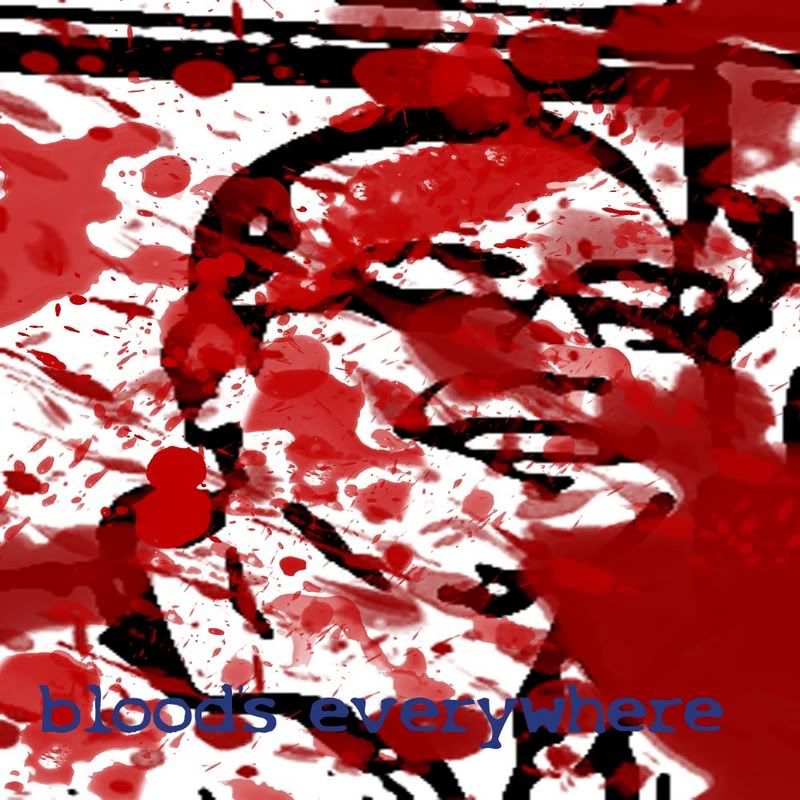
LOOK LIKE PAINTED
1. Open project file
2. Duplicate layer > Filter > Other > High Pass > Radius : 10 px
3. Click Image > Adjustments > Threshold (Setting Threshold Level) > ok
4. Set the blending mode : Overlay |
Rate
-
1
View Rating Log
-
|
|
|
|
|
|
|
|
|
|
|
CLEAN SKETCH
1. Open project file
2. Duplicate layer > Desaturate : (Ctrl + Shift + U) or Click Image > Adjustments > Desaturate
3. Duplicate layer Desaturate > Invert : ( Ctrl + I ) or Click Image > Adjustments > Invert
4. Set the blending mode > Color Dodge
5. Click Filter > Blur > Gaussian Blur (Setting Gaussian Blur) |
Rate
-
1
View Rating Log
-
|
|
|
|
|
|
|
|
|
|
|
Originally posted by aa2006 at 12-4-2007 03:03 PM
CLEAN SKETCH
1. Open project file
2. Duplicate layer > Desaturate : (Ctrl + Shift + U) or Click Image > Adjustments &g ...
Aa.. apasal lepas gausian blur tuh.. aku tak dpt result cam ko punya.. aku dpt blur je.. |
|
|
|
|
|
|
|
|
|
|
|

aku tengah gatal tangan.. taktau ape motif aku buat kepala burung ni.. hehehe.. burung ke ayam aku pun tatau.. aku tak reti buat tang mata tu last2 part tu jadik kartun dah.. 
teknik sama cam 'love bertangkai' aku buat haritu..
pakai brush basic je semua tu, sebab aku cuma pakai photoshop 6.. takde brush yang meriah2.. untuk efek bulu tu aku guna 'smudge' dan seretkan.. syok gak pakai smudge nih.. 
[ Last edited by iey_iyda at 12-4-2007 11:40 PM ] |
Rate
-
1
View Rating Log
-
|
|
|
|
|
|
|
|
|
|
|
Reply #176 iey_iyda's post
Nice work.
Nak buat good eyes, cuba surf tengok images birds' eyes. Study camna rupa, then apply kat PS.
Suggestion: Bulu kat beak dia tu cuba bagi overlap sket... sket saja... then this pic will look much better.
Also kalau ko rajin, buat complete burung... maybe best ko guna layers, then letak each part on each layer... eg. dari atas - 1. mata, 2. kepala, 3. beak, 4. sayap, 5. body... etc.
Kalau buat full bird, ko will guna banyak techniques - hint: untuk nak buat kedut2 kat kaki burung, ko buat kat image lain... buat in double (or triple size) first... then reduce and paste masuk image burung ko... aku gerenti ko terkejut (in a nice way) dengan result nya. Cuba lah. |
|
|
|
|
|
|
|
|
|
|
|
thanx 0001.. akan ku cuba buat satu badan, walaupun makan masa setahun.. hehehe.. memula ingat nak wat kucing.. last2 leret punya leret 'ter'jadik bulu burung laks..
artgeex.. aku pun taktau wat digital painting, seriyes nyer tak reti.. cuma guna kaedah smudge je (leret ikut suka).. yang bulu tu actually aku duplicate je, yang kuning tu bulu asal selepas smudge.. bila dah duplicate, aku tukar kaler merah (konon nak buat cam burung yang ada bulu warna kat leher).. then letak belakang bulu kuning tu, dan pusingkan "flip horizontal"..
nanti kalo rajin aku letak kat tutorial camner wat kepala burung tu step by step.. aku pun tengok tutorial online tapi lupa links nye kat mana..
[ Last edited by iey_iyda at 13-4-2007 12:14 PM ] |
|
|
|
|
|
|
|
|
|
|
|
Originally posted by Pak_Jen at 12-4-2007 08:15 PM
Aa.. apasal lepas gausian blur tuh.. aku tak dpt result cam ko punya.. aku dpt blur je..
Pak_Jen...
Setting Radius slider kat Gaussian Blur tu samada ke kiri atau ke kanan.
Dapatkan pixels yg sesuai unt hasil seperti contoh yang saya tepek tu.
Biasanya sesuatu image/photo tu tak sama di antara satu sama lain.
Ia bergantung kepada pengcahayaan ataupun kepekatan warna.
[ Last edited by aa2006 at 14-4-2007 01:38 AM ] |
|
|
|
|
|
|
|
|
|
|
|
Reply #181 iey_iyda's post
wow!! itu la art bulu yang paling detail pernah aku tengok.
bawah ni pulak foto aku dengan kawan kawan
aku edit pakai Microsoft Office Picture Manager.
cuma simple art jerk
nama pun simple: RGB
aku suma ubah hue/saturation
contrast aku ubah ke max
 |
Rate
-
1
View Rating Log
-
|
|
|
|
|
|
|
|
|
|
|
tumpang lalu...
sapa layan cite smallville, ni salah satu character dalam smallville...ZOD
golongan dari planet krypton yang jahat...

actually aku buat design neh hanya dengan menggunakan Rectangle Tool...
pastu masukkan sedikit effect untuk menampakkan shadow sikit..
kat bawah ni gambar yang aku jadikan panduan...
actually dalam cite smallville scene untuk zod logo tunjuk sekejap je..

gambar neh bersumberkan: INTERNET
[ Last edited by orang_letrik at 14-4-2007 07:41 PM ] |
Rate
-
1
View Rating Log
-
|
|
|
|
|
|
|
|
|
|
|
hey, nice
thanks 4 sharing |
|
|
|
|
|
|
|
|
|
| |
|


 Post time 11-4-2007 03:05 PM


 Author
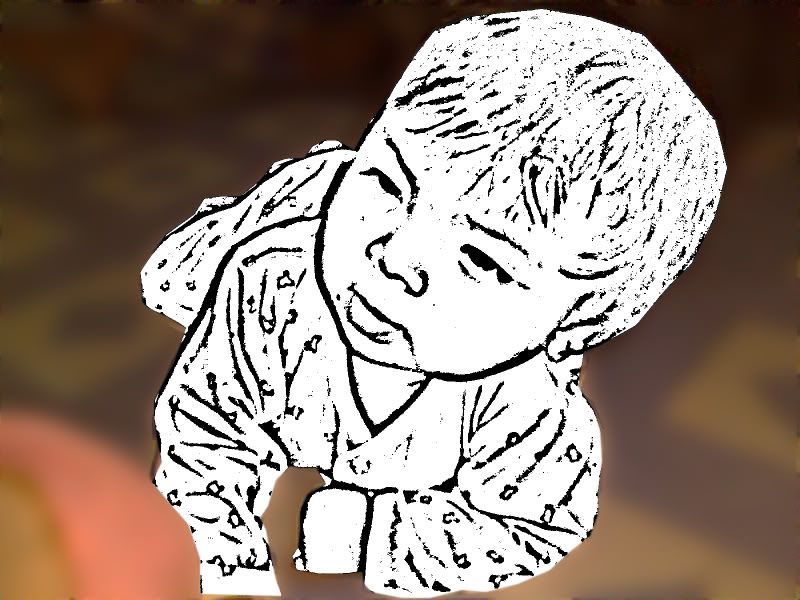


![[Edisi tahniah] Selamat Pengantin baru Afifah Nasir!](https://uf.cari.com.my/forumx/mforum/block/c9/c97d679eb37ef49a51786bd2e594be95.jpg)


